Sharing homemade desserts with loved ones is special. I remember baking red velvet brownies for a family event. My niece was excited, thinking each bite would be amazing.
The kitchen filled with a sweet smell. I couldn’t wait to see her face. When she tasted them, her smile was infectious. That moment made me love these treats even more.
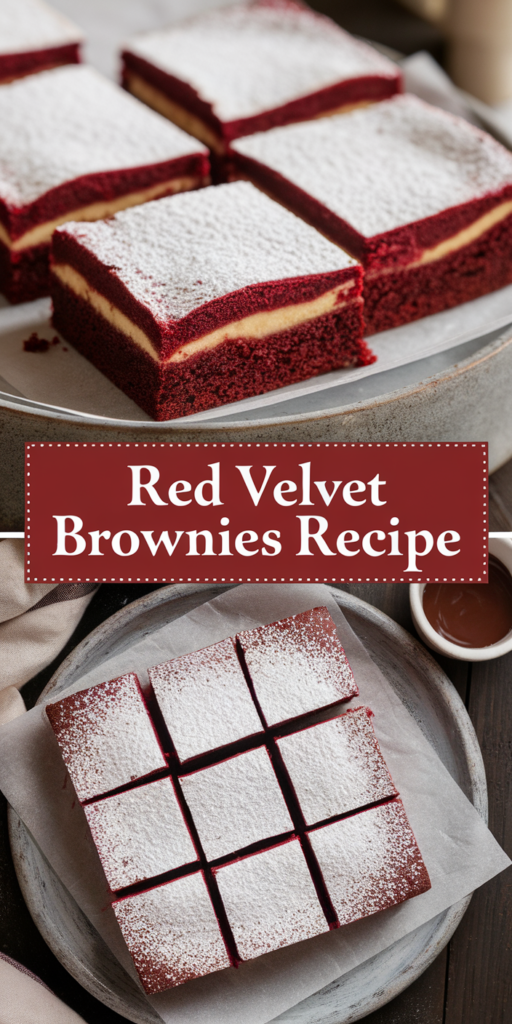
This recipe mixes the best of brownies and red velvet cake. They’re perfect for any gathering or to make someone’s day. With creamy frosting, they’re a delightful treat to share.
Introduction to Red Velvet Brownies
Red velvet brownies are a fun twist on classic treats. They mix the deep taste of brownies with the special flavor of red velvet cake. This makes a dessert that’s not only sweet but also adds color and style.
They’re perfect for special times like Valentine’s Day or Christmas. These brownies will wow your guests and make any event memorable.
The special taste of red velvet brownies comes from cocoa powder and vinegar. This mix gives a tangy flavor that people love. They’re soft and melt in your mouth, making them great for any time.
Why Choose Red Velvet Brownies?
Red velvet brownies are a standout dessert. They mix chocolatey brownies with red velvet’s beauty. This makes them the richest and most eye-catching treats.
They look elegant and are great for impressing guests. Or, they’re perfect for a special treat for yourself.
The best red velvet brownie recipe is versatile. You can add your favorite flavors or toppings. This makes it fun to experiment and find new favorites.
The brownies are chewy and fudgy. Ingredients like buttermilk and vinegar make them extra special. They’re so good, people always want more.
Making red velvet brownies is easy and fun. You can make a batch in about an hour. It makes eight servings, great for sharing or enjoying all week.
They have just the right sweetness. White and demerara sugar add a rich flavor. It’s a taste you can’t resist.
Ingredients for the Best Red Velvet Brownies
Making yummy homemade red velvet brownies starts with knowing the key ingredients. This recipe mixes fudgy brownies with red velvet cake. It makes a treat that’s both tasty and fun. Getting the right amounts is important for the perfect texture and taste.
Key Ingredients Explained
- Unsalted Butter: ¾ cup (170 g) for richness and flavor.
- Vegetable Oil: Both butter and oil make the brownies gooey and rich.
- Granulated Sugar: 1¼ cups (250 g) of caster sugar makes them sweet and fudgy.
- Light Brown Sugar: Adds flavor and keeps them moist, making them fudgy.
- Cocoa Powder: ¼ cup (20 g) of unsweetened cocoa powder gives a deep chocolate taste.
- Eggs: Two large eggs and an extra yolk make them richer by 25%.
- Vanilla Extract: 1 teaspoon (5 ml) adds a nice touch to the flavor.
- All-Purpose Flour: About ¾ cup (90 g) is needed for the right texture.
- White Wine Vinegar: 1 tablespoon (15 ml) gives the classic red velvet tang.
Optional Ingredients for Extra Flavor
There are many ways to make red velvet brownies even better. Try adding these extra ingredients for more flavor:
- White Chocolate Chips: About 1 cup (170 g) adds creaminess and sweetness.
- Chopped Nuts: Nuts add a nice crunch and depth to each bite.
- Cornstarch: 1-2 tablespoons help make them chewy.
Now you’re all set to make the perfect red velvet brownies. With the right ingredients and optional extras, you can make them just how you like. Enjoy making and eating these delicious treats!
Preparation Steps for Easy Red Velvet Brownies
Start making your easy red velvet brownies by getting ready your baking pan. It’s key to line it with parchment paper to stop sticking. This makes taking out the brownies easy and keeps them looking good.
Prepping Your Baking Pan
To get your baking pan ready:
- Use a square baking tin, about 20cm (8 inches) big.
- Put parchment paper on the bottom and sides, leaving some overhang for easy lift.
- Use pegs to keep the paper down while baking to stop it from moving.
This step is very important. It helps keep your brownies together and makes cutting them easier. Without it, dealing with sticky batter can be hard.
Mixing the Ingredients
Now, it’s time to mix the ingredients. This is a fun part of making red velvet brownies. Here are some tips for mixing them right:
- Melt unsalted butter in short 10-second bursts to avoid burning.
- Put your dry ingredients together: plain flour, cocoa powder, and salt.
- In another bowl, mix granulated sugar, brown sugar, eggs, and vanilla extract for 5 to 6 minutes until it doubles.
- Slowly mix in the dry ingredients with the wet ones, adding red food coloring gel for color.
- Don’t overmix to keep your brownies shiny and cracked on top.
A smooth batter is key for fudgy brownies. Mixing carefully helps avoid air pockets. This makes them chewy and delicious. You want the batter to be smooth but not too thin.
With these steps, you’re ready to make tasty easy red velvet brownies that everyone will enjoy!
How to Achieve the Perfect Texture
Creating moist red velvet brownies is all about the right mix of ingredients and baking time. The secret is in the fats, moisture, and how we bake them. Using enough butter or oil makes the brownies fudgy and rich.
For the best fudgy texture, bake for about 30 minutes. Unlike regular brownies, I aim for a denser treat. I use an 8×8 inch square pan to avoid overcooking. Baking until a toothpick has a few moist crumbs is key.
Choosing the right flour is important too. Gluten-free flours can work, but all-purpose flour is usually better. Adding a bit of baking powder can make the brownies a bit lighter. Knowing these tips helps make moist red velvet brownies that everyone will love.
| Ingredient | Function | Impact on Texture |
|---|---|---|
| Butter | Fat source | Increases moisture |
| Cocoa Powder | Flavor and color | Affects density |
| Eggs | Binder | Adds richness |
| Flour | Structure | Determines chewiness |
| Granulated Sugar | Sweetener | Moisture retention |
| Gel Red Food Coloring | Color enhancement | No impact on texture |
Red Velvet Brownies Recipe: Step-by-Step Guide
Making the best red velvet brownies needs focus and special mixing steps. I’ll share my top tips for the fudgiest brownies. Knowing the best baking conditions is key for a perfect texture.
Mixing Techniques for Fudgy Brownies
I start by melting ½ cup (113.5 g) of unsalted butter. Let it cool a bit. Then, I mix it with 1 cup (200 g) of sugar until it’s smooth.
Next, I add 2 large eggs, ½ tablespoon (0.5 tbsp) of vanilla extract, and ½ teaspoon (0.5 tsp) of white vinegar. I make sure each ingredient is mixed well before moving on.
The red color comes from ½ tablespoon (0.5 tbsp) of gel red food coloring. I stir it in, then add dry ingredients: 1 ½ cups (187.5 g) of flour, ¼ cup (21.5 g) of cocoa powder, and more. I gently mix these into the wet ingredients to avoid overmixing.
For extra richness, I add 1 cup (236.59 g) of chocolate chips at the end.
Baking Time and Temperature
The best baking temperature is 350°F. I pour the batter into a ready pan and bake for 28 minutes for fudgy brownies. For a cakey texture, bake for up to 30 minutes.
It’s important to watch them closely because every oven is different. Check if they’re done by inserting a toothpick. A few moist crumbs mean they’re ready.
After baking, let the brownies cool for 10-15 minutes before cutting. This makes them even better to eat. Follow my baking tips for red velvet brownies and enjoy the rich flavors and textures!
Tips for Serving Red Velvet Brownies
Enjoying red velvet brownies is better with the right presentation. I like to try new ways to serve chocolate brownies. It makes them even more fun to eat.
- Pairing with a scoop of vanilla ice cream creates a delicious contrast to the rich brownie flavor.
- Fresh berries such as strawberries or raspberries can add a burst of color and freshness to the dessert.
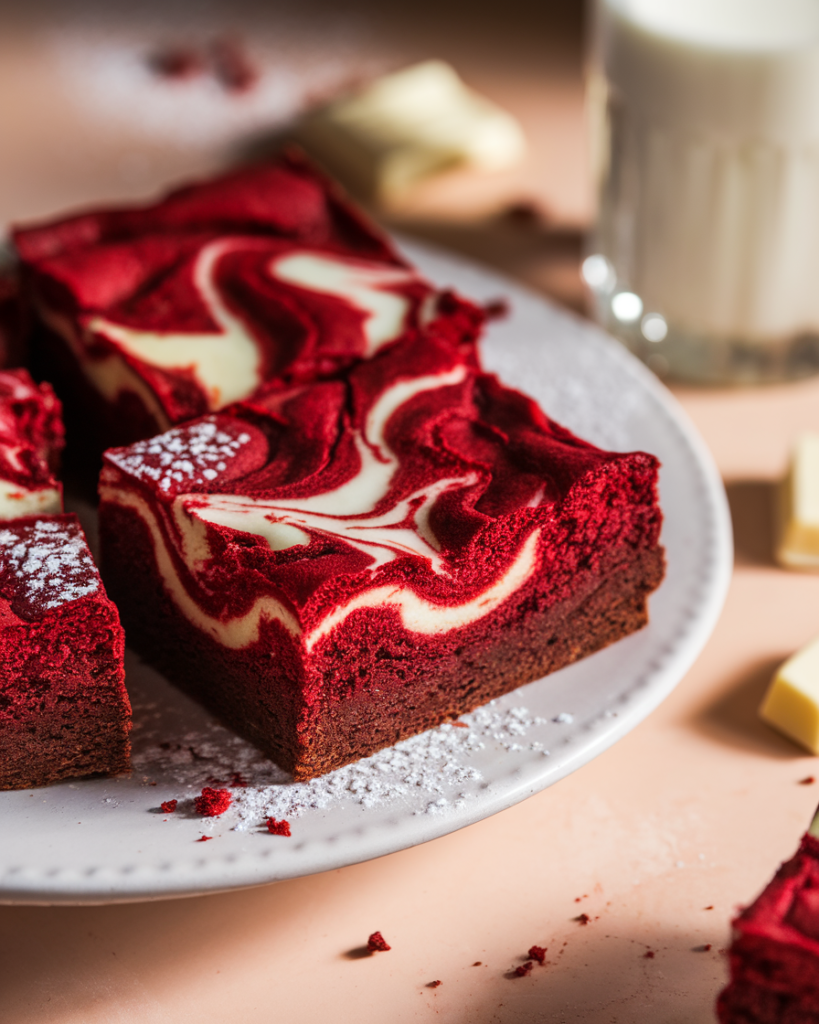
- A dusting of powdered sugar before serving enhances the visual appeal and sweetness.
- Drizzling chocolate sauce over the brownies adds an extra layer of indulgence.
- For a unique touch, I enjoy adding a dollop of whipped cream or frosting on top for a lavish red velvet brownie presentation.
Being creative with presentation makes brownies look and taste amazing. Trying new flavors and textures is fun. It makes everyone happy when they try them.
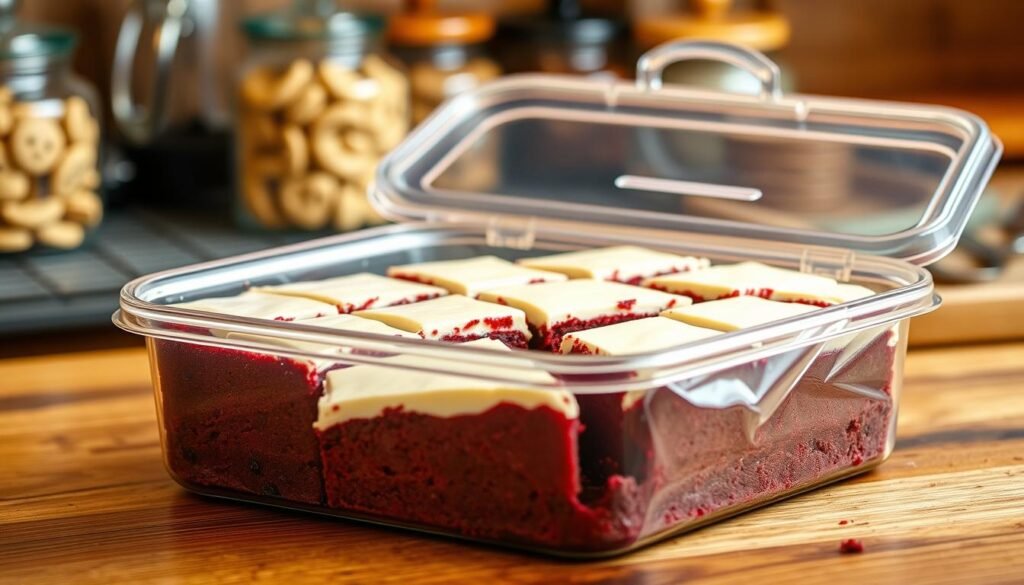
Storing Your Homemade Red Velvet Brownies
After baking, you’ll want your red velvet brownies to stay moist and tasty. The right storage is key to keeping them fresh. Here’s how to store your brownies, with or without cream cheese icing.
Best Practices for Freshness
Follow these tips to keep your brownies fresh:
- Store uniced brownies in an airtight container. They last up to 5 days at room temperature.
- Put iced brownies in the fridge. They stay fresh for up to 6 days.
- Freeze brownies for long-term storage. Wrap them tightly in plastic wrap, then in a freezer bag. They last up to 2 months.
- To thaw frozen brownies, put them in the fridge the night before. This keeps their texture good.
Remember these tips for the best taste. Whether it’s for a party or a treat, storing them right matters.
Why These Are the Best Red Velvet Brownies
These red velvet brownies are special because of their rich taste and soft texture. They mix dark chocolate, butter, and vanilla in a way that’s irresistible. Every bite is moist and fudgy, making them a favorite.
The recipe is easy to follow. You can make 16 brownies in just 45 minutes. They look great with their deep red color, perfect for any party.
Sharing these brownies with loved ones brings joy. They’re great on their own or with ice cream. Once you try them, they might become your go-to brownie.
Variations on the Classic Red Velvet Brownies Recipe
Baking is fun, and making red velvet brownies even better is exciting. You can add cinnamon or nutmeg for a special taste. Orange zest also works well with the cocoa and red color.
Try adding white chocolate chips or cream cheese for a cheesecake taste. You can also add raspberries or strawberries for a sweet contrast. These ideas make baking a fun adventure.
Don’t be afraid to try different chocolates. Use dark chocolate or add fudge for a new twist. These changes will make your brownies a hit with everyone.


